String and Barcode Input Dialog
v7 Plugins can request data (strings, barcodes, cards) from the user through dialog windows.
Here we will consider the dialog IViewManager.ShowExtendedKeyboardDialog, but there are other dialogs that can be read about in the article Dialog Windows.
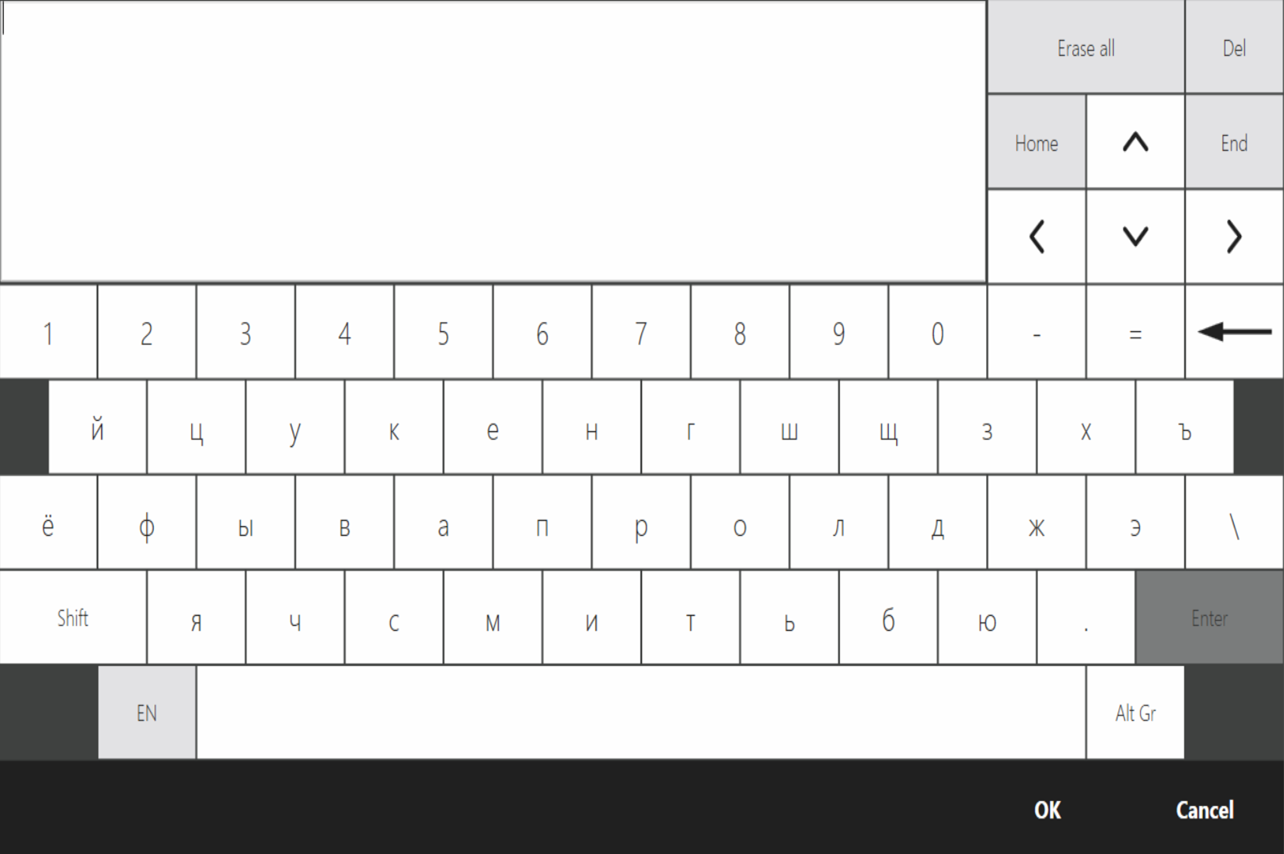
How does it look in SyrveFront?
The string input dialog can be shown anywhere where IViewManager is available.
In the plugin Resto.Front.Api.SamplePlugin in the class ButtonsTester there is an example of showing it by clicking the button SamplePlugin: Show extended keyboard view:
Further in the article, we will use this approach — showing the input window when the button is pressed.
The dialog supports the following input types:
- arbitrary string.
- hidden string.
- barcode scanning.
- card reading.
The dialog accepts 8 parameters:
string title- dialog title.string initialText- optional parameter. The string that will be entered when the dialog is shown. By defaultString.Empty.bool isMultiline- optional parameter. Allows entering multiline text. Ignored when theisPasswordparameter is set totrue. By defaulttrue.int maxLength- optional parameter. Maximum length of the string. By defaultInt32.MaxValue.bool capitalize- optional parameter. Whether to automatically capitalize words. Ignored if theisPasswordparameter istrue. By defaultfalse.bool isPassword- optional parameter. Whether to hide the string when entering. By defaultfalse. Ignored if bothisMultilineandcapitalizeparameters aretrue.bool enableCardSlider- optional parameter. Whether data can be entered using card swiping. By defaultfalse.bool enableBarcode- optional parameter. Whether data can be entered using barcode scanning. By defaultfalse.
Entering an arbitrary string
The input of an arbitrary string is influenced by the parameters initialText, isMultiline, and capitalize.
For example, let’s prohibit multiline input, and the entered string will start with a capital letter:
PluginContext.Operations.AddButtonToPluginsMenu("SamplePlugin: String input example", x =>
{
    var inputResult = x.vm.ShowExtendedKeyboardDialog("String input example", isMultiline: false, capitalize: true);
});
With these parameters, the dialog will only respond to keyboard input. Scanning a barcode and card swiping will not be taken into account. All words will be entered with a capital letter. This can be useful when entering a first name, last name, and patronymic.
The obtained result must be cast to the type StringInputDialogResult.
Let’s supplement the code:
PluginContext.Operations.AddButtonToPluginsMenu("SamplePlugin: String input example", x =>
{
    var inputResult = x.vm.ShowExtendedKeyboardDialog("String input example", isMultiline: false, capitalize: true);
    var strResult = inputResult as StringInputDialogResult;
    if (strResult == null)
        return; //User pressed "Cancel"
    var result = strResult.Result; //Text entered by the user
});
Entering a hidden string
You can hide the entered string using the isPassword parameter:
PluginContext.Operations.AddButtonToPluginsMenu("SamplePlugin: Password input example", x =>
{
    var inputResult = x.vm.ShowExtendedKeyboardDialog("Password input example", isPassword: true);
    var strResult = inputResult as StringInputDialogResult;
    if (strResult == null)
        return; //User pressed "Cancel"
    var result = strResult.Result; //Hidden text entered by the user
});
As mentioned above, the parameters isMultiline and capitalize will not be taken into account.
However, it remains possible to pass true to the enableCardSlider and enableBarcode parameters, which will allow card swiping and barcode scanning.
Reading cards
You can track card reading using the enableCardSlider parameter.
The result must be cast to the type CardInputDialogResult:
PluginContext.Operations.AddButtonToPluginsMenu("SamplePlugin: Card input example", x =>
{
    var inputResult = x.vm.ShowExtendedKeyboardDialog("Card input example", enableCardSlider: true);
    var cardResult = inputResult as CardInputDialogResult;
    if (cardResult == null)
        return; //User pressed "Cancel", or there was another input type
    var result = cardResult.FullCardTrack; //Full card information
});
It is not possible to prohibit input via the keyboard in this case.
Scanning a barcode
You can track barcode scanning using the enableBarcode parameter.
In this case, scanning service barcodes will not be taken into account.
The result must be cast to the type BarcodeInputDialogResult:
PluginContext.Operations.AddButtonToPluginsMenu("SamplePlugin: Barcode input example", x =>
{
    var inputResult = x.vm.ShowExtendedKeyboardDialog("Barcode input example", enableBarcode: true);
    var barcodeResult = inputResult as BarcodeInputDialogResult;
    if (barcodeResult == null)
        return; //User pressed "Cancel", or there was another input type
    var result = barcodeResult.Barcode; //Scanned barcode
});
Mixed input
Let our dialog work with both text input and barcodes, as well as cards.
Then we need to properly handle the input result.
In SamplePlugin, there is an example of such an approach.
Let’s modify our code to support all input types:
PluginContext.Operations.AddButtonToPluginsMenu("SamplePlugin: Mixed input example", x =>
{
    var inputResult = x.vm.ShowExtendedKeyboardDialog("Mixed input example", enableCardSlider: true, enableBarcode: true);
    switch (inputResult)
    {
        case StringInputDialogResult stringInputDialogResult:
            var strResult = stringInputDialogResult.Result; //Text entered by the user
            return;
        case CardInputDialogResult cardInputDialogResult:
            var cardResult = cardInputDialogResult.FullCardTrack; //Full card information
            return;
        case BarcodeInputDialogResult barcodeInputDialogResult:
            var barcodeResult = barcodeInputDialogResult.Barcode; //Scanned barcode
            return;
        default:
            return; //User pressed "Cancel"
    }
});